Difference between revisions of "Help"
| (37 intermediate revisions by the same user not shown) | |||
| Line 1: | Line 1: | ||
= Prerequisites = | = Prerequisites = | ||
| − | * [http://www.oracle.com/technetwork/pt/java/javase/downloads/jdk8-downloads-2133151.html Oracle | + | * [http://www.oracle.com/technetwork/java/javase/downloads/jre8-downloads-2133155.html Oracle Java Runtime 8] |
| + | or if you'd like to build can4eve yourself: | ||
| + | * [http://www.oracle.com/technetwork/pt/java/javase/downloads/jdk8-downloads-2133151.html Oracle Java Development Kit 8 ] | ||
* [https://maven.apache.org/install.html Maven 3] | * [https://maven.apache.org/install.html Maven 3] | ||
= Installation = | = Installation = | ||
# Download the software for your platform from {{Link|target=Downloads}} | # Download the software for your platform from {{Link|target=Downloads}} | ||
| − | + | or {{Link|target=Installation|title=build}} the software yourself | |
| − | |||
| − | == | ||
| − | |||
| − | |||
| − | |||
| − | |||
| − | |||
| − | |||
| − | |||
| − | |||
| − | |||
| − | |||
| − | |||
| − | |||
| − | |||
| − | |||
| − | |||
| − | |||
| − | |||
| − | |||
= Starting = | = Starting = | ||
Run the software with <nowiki>java -jar can4eve.jar</nowiki> or <nowiki>can4eve</nowiki> (If you built the software yourself: <nowiki>cd can4eve/obdii/release</nowiki> before this command) | Run the software with <nowiki>java -jar can4eve.jar</nowiki> or <nowiki>can4eve</nowiki> (If you built the software yourself: <nowiki>cd can4eve/obdii/release</nowiki> before this command) | ||
| − | + | A {{Link|target=Help/Language|title=Welcome Wizard}} will guide you thru the setup process. | |
| − | = Configuring your OBD connection = | + | |
| + | = (Re) Configuring your OBD connection = | ||
Select the menu Settings/OBDII | Select the menu Settings/OBDII | ||
* Network connection: Select the deviceType Network, set the hostname and port | * Network connection: Select the deviceType Network, set the hostname and port | ||
* USB connection: Select the deviceType USB, select the serialDevice via the "..." button near the serialDevice, set the baudRate (only click direct if you are setting the baudrate via a different means e.g. stty) | * USB connection: Select the deviceType USB, select the serialDevice via the "..." button near the serialDevice, set the baudRate (only click direct if you are setting the baudrate via a different means e.g. stty) | ||
| − | * Bluetooth connection: Not directly supported as of 2017-07 - you might want to e.g. use the forward | + | * Bluetooth connection: Not directly supported as of 2017-07 - you might want to e.g. use the {{Link|target=OBDLink_LX#Forwarding the OBDII Adapter via TCP/IP}} or {{Link|target=TCPIP_forwarding|title=forward via can4eve}} options |
* Simulator connection: Select the deviceType simulator | * Simulator connection: Select the deviceType simulator | ||
| + | |||
| + | Click "testConnection". | ||
| + | The result should be e.g.: | ||
| + | [[File:ConnectionOK2017-07-11.png|400px]] | ||
| + | |||
| + | Now you should be able to use the Menu OBD/Start or OBD/Start withLog. | ||
= Panels = | = Panels = | ||
[[File:StartScreen2017-07-07.png|800px]] | [[File:StartScreen2017-07-07.png|800px]] | ||
| − | = Clocks = | + | == Clocks == |
[[File:Clocks.png|800px]] | [[File:Clocks.png|800px]] | ||
| − | = Odometer = | + | == Odometer == |
[[File:Odometer.png|800px]] | [[File:Odometer.png|800px]] | ||
| − | = SOC = | + | == SOC == |
[[File:SOC.png|800px]] | [[File:SOC.png|800px]] | ||
| − | = RPM = | + | == RPM == |
[[File:RPM.png|800px]] | [[File:RPM.png|800px]] | ||
| + | |||
| + | = Troubleshooting = | ||
| + | == Connection refused == | ||
| + | If you get the message "Connection failed", "ConnectException: Connection refused(Connection refused)". You might want to check | ||
| + | the hostname and port settings. | ||
| + | Also you can tryout the connection e.g. on a command line. | ||
| + | |||
| + | See e.g. {{Link|target=VGate_ICar_2#Testing}} | ||
| + | |||
| + | == NoClassDefFoundError: javafx/event/EventHandler == | ||
| + | If you get the following error message on OpenJDK: | ||
| + | <source lang='java'> | ||
| + | java -jar can4eve.jar | ||
| + | Exception in thread "main" java.lang.NoClassDefFoundError: javafx/event/EventHandler | ||
| + | at java.lang.ClassLoader.defineClass1(Native Method) | ||
| + | at java.lang.ClassLoader.defineClass(ClassLoader.java:763) | ||
| + | ... | ||
| + | Caused by: java.lang.ClassNotFoundException: javafx.event.EventHandler | ||
| + | at java.net.URLClassLoader.findClass(URLClassLoader.java:381) | ||
| + | at java.lang.ClassLoader.loadClass(ClassLoader.java:424) | ||
| + | at sun.misc.Launcher$AppClassLoader.loadClass(Launcher.java:335) | ||
| + | at java.lang.ClassLoader.loadClass(ClassLoader.java:357) | ||
| + | </source> | ||
| + | You might want to follow the following instructions: | ||
| + | * https://stackoverflow.com/a/34244308/1497139 | ||
| + | That is | ||
| + | <source lang='bash'> | ||
| + | sudo apt-get install openjfx | ||
| + | </source> | ||
| + | === fix for Raspberry PI === | ||
| + | If on a Raspberry PI you get the message <nowiki>java.lang.NoClassDefFoundError: javafx/application/Application></nowiki> | ||
| + | |||
| + | get the SDK from: | ||
| + | http://gluonhq.com/products/mobile/javafxports/get/ | ||
| + | |||
| + | <source lang='bash'> | ||
| + | cd /usr/local/src | ||
| + | sudo wget http://download.gluonhq.com/javafxports/embedded/armv6hf-sdk-8.60.9.zip | ||
| + | sudo unzip armv6hf-sdk-8.60.9.zip | ||
| + | cd /usr/lib/jvm/jdk-8-oracle-arm32-vfp-hflt/jre/lib/ext | ||
| + | sudo ln -s /usr/local/src/armv6hf-sdk/rt/lib/arm . | ||
| + | sudo ln -s /usr/local/src/armv6hf-sdk/rt/lib/ext/jfxrt.jar . | ||
| + | sudo ln -s /usr/local/src/armv6hf-sdk/lib/javafx-mx.jar . | ||
| + | sudo ln -s /usr/local/src/armv6hf-sdk/rt/lib/jfxswt.jar . | ||
| + | </source> | ||
| + | |||
| + | == java.net.BindException: Address already in use (Bind failed) == | ||
| + | There is probably another instance of can4eve already running. In rare cases another application might use the same port as can4eve. | ||
| + | == java.net.SocketException: Network is unreachable (connect failed) == | ||
| + | At the network address and port you selected there was no connection possible. Please check the settings and the network device you'd like to connect to. | ||
| + | E.g. you can do a ping to the network address and try a telnet to the given port. | ||
| + | see {{Link|target=Help/NetworkConnection}} | ||
| + | |||
| + | == com.bitplan.elm327.OBDException == | ||
| + | Their has been a problem with the OBD connection. The most common error is a timeout which might e.g. happen if you set the wrong baud rate or the device is not listening e.g. because it went to sleep. | ||
| + | == java.net.ConnectException: Connection refused (Connection refused) == | ||
| + | The network is reachable at the address but not the port you specified.\nYou might want to check the network device and the settings. | ||
| + | see {{Link|target=Help/NetworkConnection}} | ||
| + | |||
| + | == File descriptor is -1 < 0, == | ||
| + | <pre> | ||
| + | INFORMATION: purejavacomm.PureJavaIllegalStateException: File descriptor is -1 < 0, maybe closed by previous error condition | ||
| + | </pre> | ||
| + | The OBDII-Adapter is not properly connected or there is another issue with the connection. | ||
| + | |||
| + | = Mediawiki Help = | ||
| + | [https://www.mediawiki.org/wiki/Help:Contents Mediawiki Help] | ||
| + | |||
| + | [[Category:Help]] | ||
Latest revision as of 07:17, 6 September 2019
Prerequisites
or if you'd like to build can4eve yourself:
Installation
- Download the software for your platform from Downloads
or build the software yourself
Starting
Run the software with java -jar can4eve.jar or can4eve (If you built the software yourself: cd can4eve/obdii/release before this command) A Welcome Wizard will guide you thru the setup process.
(Re) Configuring your OBD connection
Select the menu Settings/OBDII
- Network connection: Select the deviceType Network, set the hostname and port
- USB connection: Select the deviceType USB, select the serialDevice via the "..." button near the serialDevice, set the baudRate (only click direct if you are setting the baudrate via a different means e.g. stty)
- Bluetooth connection: Not directly supported as of 2017-07 - you might want to e.g. use the OBDLink_LX#Forwarding the OBDII Adapter via TCP/IP or forward via can4eve options
- Simulator connection: Select the deviceType simulator
Click "testConnection".
The result should be e.g.:
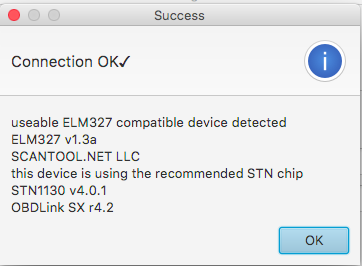
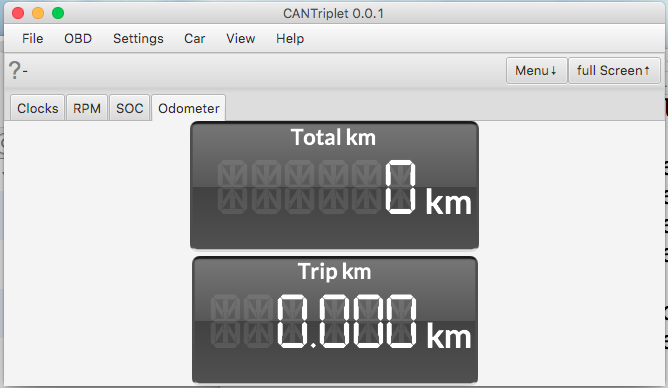
Now you should be able to use the Menu OBD/Start or OBD/Start withLog.
Panels
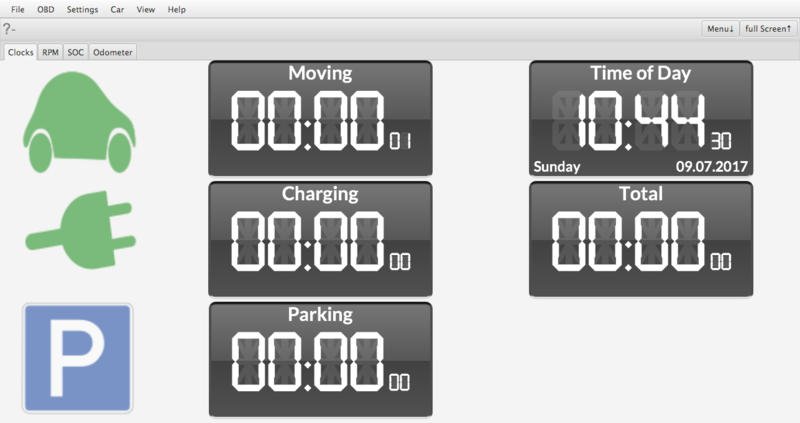
Clocks
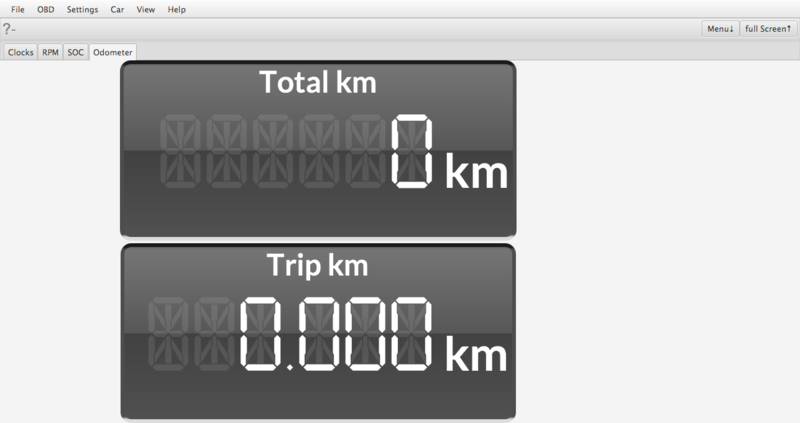
Odometer
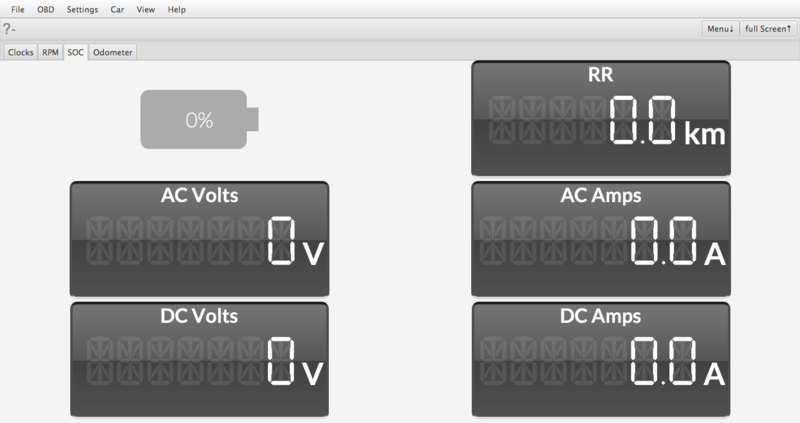
SOC
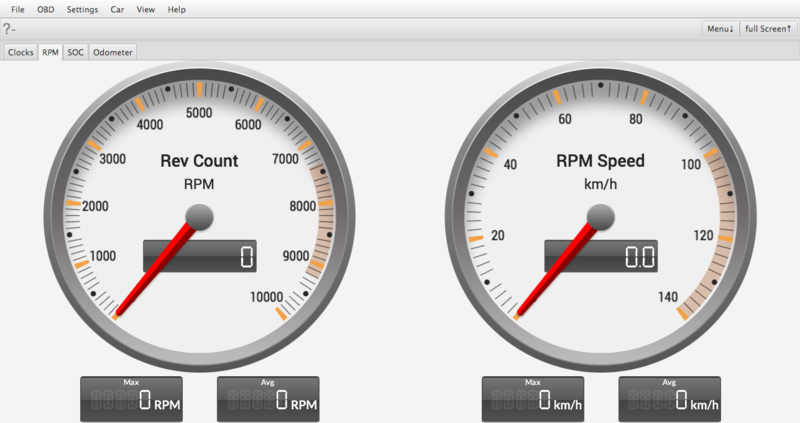
RPM
Troubleshooting
Connection refused
If you get the message "Connection failed", "ConnectException: Connection refused(Connection refused)". You might want to check the hostname and port settings. Also you can tryout the connection e.g. on a command line.
See e.g. VGate_ICar_2#Testing
NoClassDefFoundError: javafx/event/EventHandler
If you get the following error message on OpenJDK:
java -jar can4eve.jar
Exception in thread "main" java.lang.NoClassDefFoundError: javafx/event/EventHandler
        at java.lang.ClassLoader.defineClass1(Native Method)
        at java.lang.ClassLoader.defineClass(ClassLoader.java:763)
...
Caused by: java.lang.ClassNotFoundException: javafx.event.EventHandler
        at java.net.URLClassLoader.findClass(URLClassLoader.java:381)
        at java.lang.ClassLoader.loadClass(ClassLoader.java:424)
        at sun.misc.Launcher$AppClassLoader.loadClass(Launcher.java:335)
        at java.lang.ClassLoader.loadClass(ClassLoader.java:357)
You might want to follow the following instructions:
That is
sudo apt-get install openjfx
fix for Raspberry PI
If on a Raspberry PI you get the message java.lang.NoClassDefFoundError: javafx/application/Application>
get the SDK from: http://gluonhq.com/products/mobile/javafxports/get/
cd /usr/local/src
sudo wget http://download.gluonhq.com/javafxports/embedded/armv6hf-sdk-8.60.9.zip
sudo unzip armv6hf-sdk-8.60.9.zip
cd /usr/lib/jvm/jdk-8-oracle-arm32-vfp-hflt/jre/lib/ext
sudo ln -s /usr/local/src/armv6hf-sdk/rt/lib/arm .
sudo ln -s /usr/local/src/armv6hf-sdk/rt/lib/ext/jfxrt.jar .
sudo ln -s /usr/local/src/armv6hf-sdk/lib/javafx-mx.jar .
sudo ln -s /usr/local/src/armv6hf-sdk/rt/lib/jfxswt.jar .
java.net.BindException: Address already in use (Bind failed)
There is probably another instance of can4eve already running. In rare cases another application might use the same port as can4eve.
java.net.SocketException: Network is unreachable (connect failed)
At the network address and port you selected there was no connection possible. Please check the settings and the network device you'd like to connect to. E.g. you can do a ping to the network address and try a telnet to the given port. see Help/NetworkConnection
com.bitplan.elm327.OBDException
Their has been a problem with the OBD connection. The most common error is a timeout which might e.g. happen if you set the wrong baud rate or the device is not listening e.g. because it went to sleep.
java.net.ConnectException: Connection refused (Connection refused)
The network is reachable at the address but not the port you specified.\nYou might want to check the network device and the settings. see Help/NetworkConnection
File descriptor is -1 < 0,
INFORMATION: purejavacomm.PureJavaIllegalStateException: File descriptor is -1 < 0, maybe closed by previous error condition
The OBDII-Adapter is not properly connected or there is another issue with the connection.
